Product AdKit vs Flair AI
Product AdKit vs Flair AI
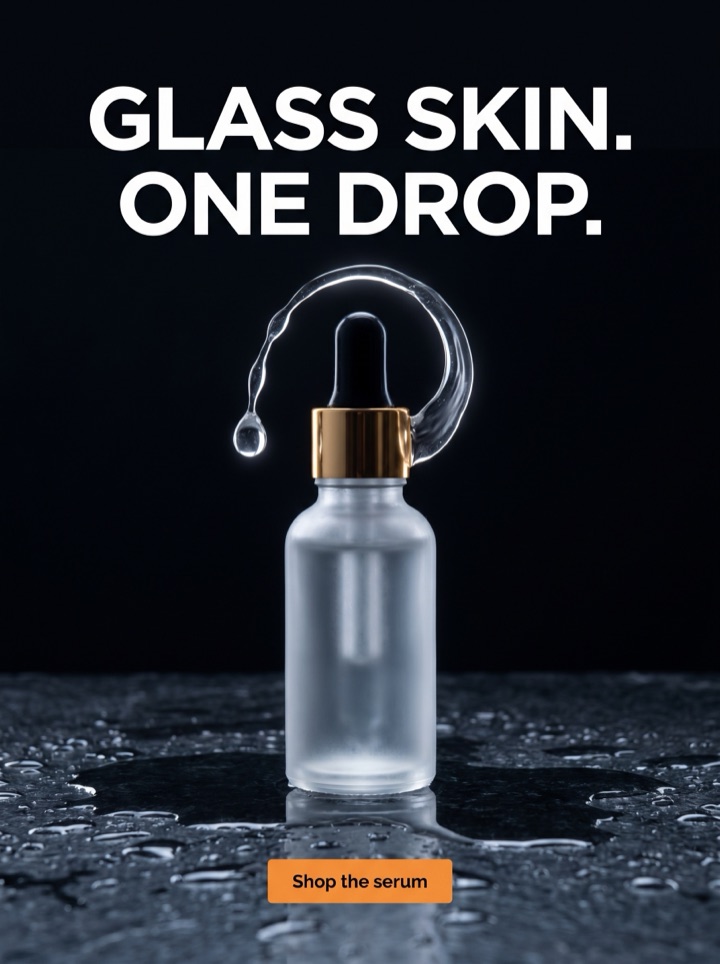
Flair AI stages your product in generated scenes and studio lighting. Product AdKit takes a photo and writes the hooks, CTAs, layouts, and Meta sizes around it.
Free previews are full-quality and view-only. Unlock the full pack only once a Flair-style product shot has become an actual ad worth exporting as high-res, no-watermark files in Meta sizes.
Examples
Product AdKit vs Flair AI examples
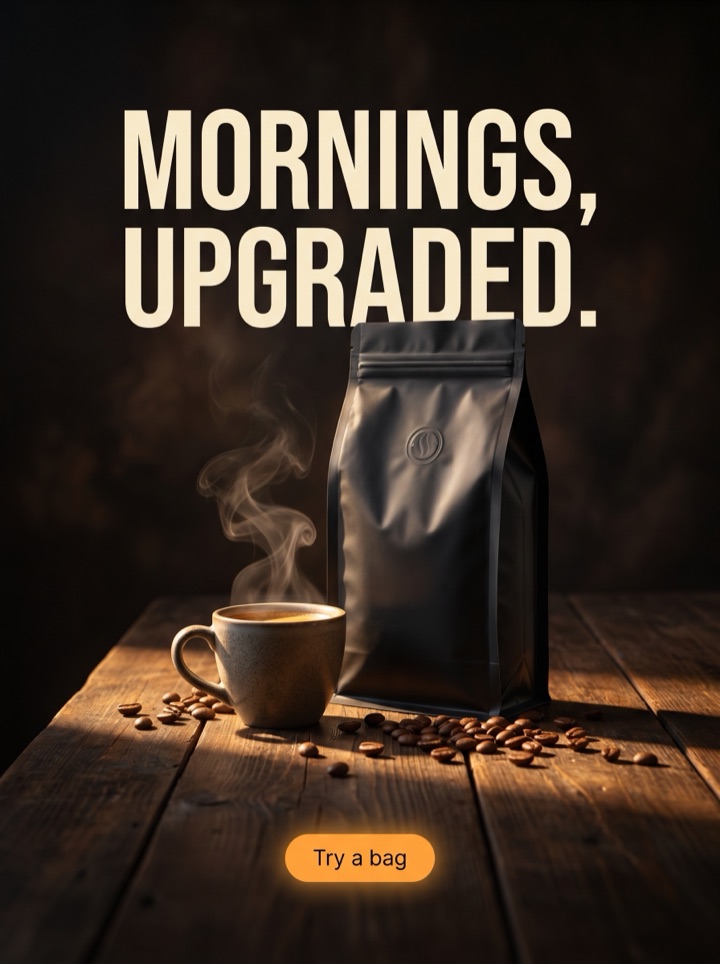
Flair AI gives you a beautiful product render; the next question is what ad it becomes. These examples show where Product AdKit picks up: the same kind of clean product shot, now carrying a hook, an offer, and a CTA at a real placement size.


Methodology
Comparison method and disclosure.
We make Product AdKit, so this page is not neutral. It compares the job each tool is best for, cites public sources, and states where the other product is the better choice.
Sources checked
Prices and feature claims should be rechecked before major edits. This version was reviewed on June 4, 2026 against official Flair AI source and Product AdKit's shipped static-ad workflow.
Where Flair AI wins
Flair AI is stronger for ecommerce product imagery, lifestyle scenes, on-model photography, bulk visual generation, and API-led image workflows.
Where Product AdKit wins
Product AdKit is the downstream ad layer: it turns the product image into static ad variants and keeps the creative test moving.
Campaign brief
Product AdKit vs Flair AI campaign brief
If you already use Flair AI, you have the hard part solved: a product that looks staged and lit. This brief is about the step after the render, turning that image into ads you can actually run this week.
Where each fits
Reach for Flair AI when the goal is the photograph itself, a believable scene, lighting, and set. Reach for Product AdKit when that photo needs a headline, an offer, and a placement before it can run as an ad.
Asset to upload
A Flair AI export is an ideal input: clean subject, room around it for copy, and a scene that does not fight the headline. Plain pack-shots work too. Product AdKit wraps the ad layer around whatever you upload.
First test
Take one Flair scene and let Product AdKit spin it into a premium angle and a flash-sale angle. Keep the render and crop identical so the only variable is the message, not the photography.
Format choice
Export 1:1 square and 4:5 feed first. A gorgeous Flair render can still lose its CTA when cropped to story; check the smaller placement before you commit to it.
Copy direction
Flair gives you the mood; the words still have to do the selling. Lead with the buying reason, not a description of how nice the scene looks.
Human review
A polished scene can hide a weak hook. Read the headline with the image covered: if it could sit on any product, the render is carrying the ad and the copy is not pulling its weight.
How it works
From a Flair-style render to a runnable ad in four steps.
1
Bring the photo
Upload a Flair AI scene or any clean product image. Product AdKit treats it as the hero rather than restaging it in a new generated set.
2
Choose the buying reason
Pick the angle the render should sell: proof, urgency, launch, premium, or bundle. This is the layer Flair leaves to you.
3
Preview the pack
Review view-only previews to see the same scene carry a few different hooks and CTAs before paying or briefing anyone.
4
Export what you can test
Unlock high-res, no-watermark files once the layout still reads at feed and story size, then run it in Meta placements.
Examples
Product AdKit vs Flair AI examples
Once a scene is in Product AdKit, it can run as any of these angles. This is the layer Flair AI leaves to you.
Field notes
Product AdKit vs Flair AI field notes
Notes from running Flair-style renders through an ad workflow, the small things that decide whether a beautiful scene actually performs once it carries a message.
Creative review
- A Flair render can be so polished that you forget to ask what the ad is saying. Cover the image and read just the headline: it should still make someone want the product.
- If the generated scene is busy, let the copy go quiet. Two strong elements beat a gorgeous background fighting a bold hook for the same attention.
- Pair one proof-led version with one offer-led version off the same Flair shot. The winner usually depends on whether the audience already knows the category.
- Keep the product the largest thing in frame. Flair's lighting and surfaces should support the offer, not become the subject of the ad.
Placement review
- A scene that looks editorial on desktop can crop awkwardly in feed. Check the Flair-sourced ad at phone width before you trust it.
- Run a calm premium cut, a direct promotional cut, and a proof-heavy cut from one render. That contrast tells you more than three near-identical variants.
- Do not let the photography promise something the product page cannot back up. The ad should earn the click, not set up a landing page that has to walk it back.
Export review
- Unlock a paid pack when at least two previews show a genuinely different buying reason, not the same Flair scene with a swapped headline.
- If the product has real packaging, texture, or scale details, let those carry proof instead of stacking generic badges over a clean render.
- Keep the final export boring in the good way: product readable, offer clear, CTA obvious, and no roadmap-only format shown as if it ships today.
Sizes and exports
Sizes and exports for a Flair render turned ad
Where Flair AI hands you an image to resize yourself, Product AdKit is built around named placements. Static posters ship first; display and HTML5 ZIP exports stay clearly labeled as agency or roadmap workflows until enabled.
1:1 square
Use 1:1 square when the Flair scene needs a balanced product, hook, and CTA in one tidy frame.
4:5 feed
Use 4:5 feed when a vertical render needs more room than a square but should still live in the main feed.
9:16 story/reels
Use 9:16 for full-screen mobile, where the render and CTA need strong top-to-bottom spacing to survive the crop.
Facebook feed
Use the Facebook feed size when the same scene needs to read in a slightly different aspect than Instagram without re-rendering it.
Flair AI gets you a striking product photo. Product AdKit decides what to do with it next: which hook to test, which placement to export, and what stays locked behind a paid pack. The two pair well, Flair for the image, Product AdKit for the ad it becomes.
Copy examples
Hooks, CTAs, and mistakes for Product AdKit vs Flair AI.
Headline hooks
- Flair AI makes the photo. Product AdKit makes the ad.
- You have the perfect render. Now give it a hook and a CTA.
- From a Flair scene to a runnable Meta ad in one upload.
- The scene is studio-grade; let the copy do the selling.
- One Flair render, five buying reasons to test this week.
- Stop captioning your product shots by hand.
- Beautiful photography is step one. The ad pack is step two.
- Turn your best Flair image into ad sizes, not just a download.
CTA examples
- Turn a render into ads
- Generate a free preview
- See the ad pack
- Add the copy layer
- View pricing
Common mistakes
- Treating Flair AI and Product AdKit as rivals when one makes the photo and the other makes the ad around it.
- Shipping a gorgeous Flair scene with no hook, offer, or CTA and wondering why it does not convert.
- Letting the render carry the whole ad so the headline could belong to any product.
- Exporting one hero image instead of testing a few buying-reason variations off the same shot.
- Resizing the render by hand for each placement instead of generating named ad sizes.
Examples
Product AdKit vs Flair AI examples
Run this quick human pass before you turn a Flair-style render into production ads.
1
With the image covered, does the headline alone still make someone want this specific product?
2
Does the ad add a hook, an offer, and a CTA, or is it just a captioned Flair photo?
3
Are live static sizes kept separate from roadmap formats like HTML5 ZIP or video?
4
Does the product stay readable and the CTA survive once the scene is cropped to feed and story?
5
Do at least two variants show a genuinely different buying reason off the same render?
FAQ
Product AdKit vs Flair AI questions
What is the difference between Flair AI and Product AdKit?
Flair AI is a product-photography tool: you drag your product into a scene and it generates the lighting, background, and set so the photo looks studio-shot. Product AdKit starts after that, turning a product photo into finished ads with headlines, CTAs, layouts, and Meta export sizes.
Does Flair AI write ad copy and headlines like Product AdKit?
No. Flair AI produces the image; the hook, offer line, and call to action are still on you. Product AdKit generates the copy, the layout, and the placement crop together, so a preview is a testable ad rather than a clean product shot you still have to caption.
Can I use a Flair AI scene as the input photo for Product AdKit?
Yes. A polished Flair AI scene is a good starting image. Upload that render or any clean product photo to Product AdKit, and it builds the ad angles, headlines, and Meta sizes around it.
Does Product AdKit place the product into generated 3D scenes the way Flair AI does?
No. Product AdKit does not build a 3D set or stage the product in a generated environment. It treats your existing photo as the hero and wraps it in ad copy, layout, and platform-ready sizes for Meta placements.
Related tools